The week of Thanksgiving gave me both time to go to Chinatown to have Thanksgiving dinner, time to gamble a bit in Atlantic City, and time to polish my renderer. Speed was once again improved due to a more "greedy algorithm" in scene traversal. Moreover, path tracing support was also added to the renderer (using a path tracing / bidirectional path tracing hybrid model), and it works really well for outdoor scenes, where photon mapping lacks good support. Next, the scene can now be freely edited. Each object as defined in the obj file is extracted out as separate objects, and the user can translate/scale/rotate/delete any of them as needed. Thanks to the fast kd-tree/photon map builder, operating on the scene and reconstructing the entire kd-tree is pretty painless. Last but now least, we can now freely choose from one of six rendering methods during run time: OpenGL wireframe, OpenGL smooth, (bidirectional) path tracing, direct photon mapping, photon mapping with final gathering and ambient occlusion. Below are three videos showcasing the renderer's current capabilities with different scene settings.
The first is a test scene I made for path tracing and scene editing. It includes a bunny, among other objects. The scene contains only 7K triangles.
The second video is our familiar Sponza scene, with 72K triangles. Note the improved performance and brighter interior space (after a fix made to Photon Mapping algorithm).
The third video is for editing the new interior scene, with 608K triangles (I got the wrong triangle count the last time).
Sunday, November 28, 2010
Monday, November 22, 2010
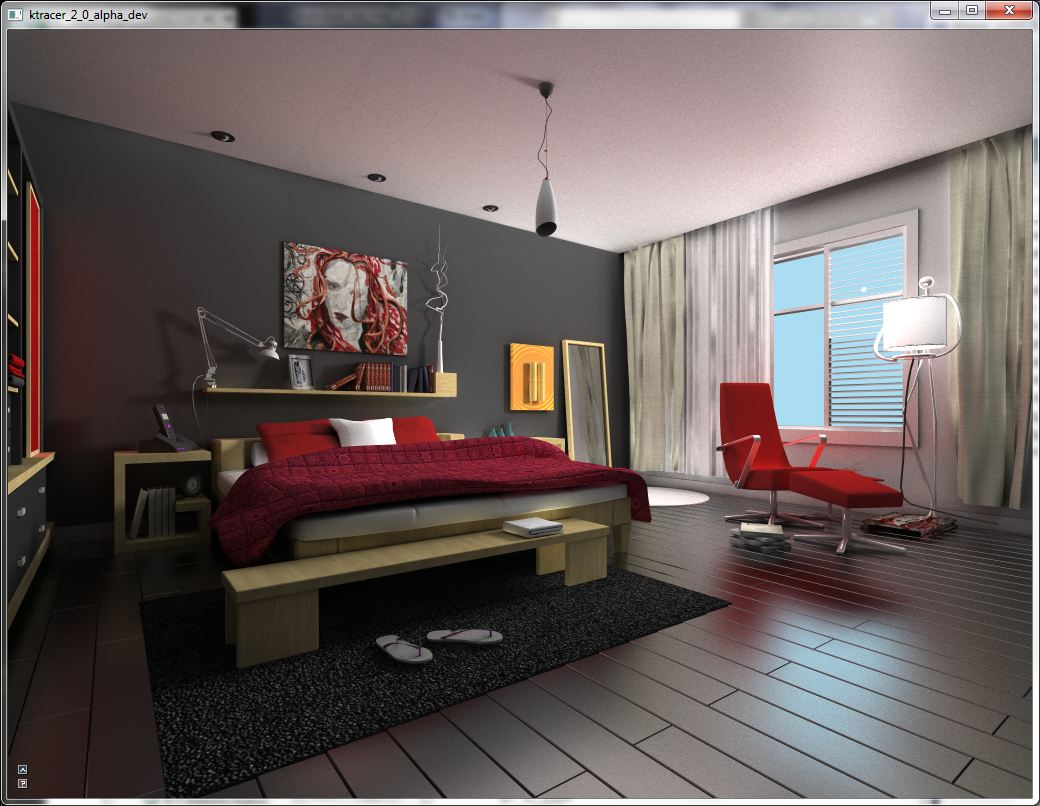
More updates on the indoor scene rendering results...
After spending today tweaking the indoor scene settings, adding more textures, using disk-shaped photon collector instead of a spherical one, making the light source external and sun-like, and fixing bugs here and there, the image quality is notably better:
 Note that by using disk-shaped collector, false color bleeding near the edges and on thin objects (quilt, books) has been largely solved.
Actual indoor scene, normal map, more BRDF support, and more
The last week I began to use an actual indoor scene for my renderer. It was freely available online, but since it was made with 3DS MAX and V-Ray and the OBJ exporter doesn't support V-Ray textures etc, I had to remap all the material and textures (They are not set either, I had to literally look at a final render the website provided and do some matching work). I also made up a test scene to play with different BRDF (the renderer only used to support perfectly diffuse, Lambertian surfaces). The following is a test scene with ambient occlusion and glossy reflection.
 So I started with this scene with no texture mapping, material settings. It contains 1400K triangles, many more than Sponza's 70K, and can indeed be a stress to the renderer.
 I had to find textures from online and set all the materials (lots of which needed to be set manually in the MTL file since I'm not familiar with 3DS MAX). I also implemented normal mapping, perfectly specular material, and Oren-Nayar reflectance model. After increasing the photon count to 200K, the current result is shown in the following image.

Notice the correct color bleeding (it wasn't correct at the beginning and that wasn't found in the Sponza scene since the mesh kind of has a uniform color). Also note that the floor and the left wall is glossy, the mirror is perfectly specular, the quilt is Lambertian, some of the wooden furniture is Oren-Nayar and the rest are Phong. Also, the quilt and the rug have normal maps attached. With this setting, I'm still able to achieve interactive rate (shown in the video below). I also fixed the problem where the program with reset the video card after a timeout. In addition to cudaThreadSynchronize() to make the calls synchronous, we also need to set two registry keys in Windows to bypass the timeout check.
Finally, this is a rendering result provided by the website providing the 3D model. There's obviously still a long way to go before achieving this level of picture quality, and it can be very challenging considering the interactive nature of this renderer.

Sunday, November 14, 2010
Faster and clearer irradiance caching and ambient occlusion
The past week has been spent on optimizing irradiance caching, reducing artifacts and trying other options such as ambient occlusion. Irradiance caching was accelerated further during the past week by around 5 times, and the small scanline-like artifacts have been significantly reduced although there are still block artifacts. The blocks were removed by implementing a "Behind Test" as described by Ward in his SIGGRAPH course. I also tried other options during the week such as ambient occlusion and sun light imitation. In scenes such as Sponza where color bleeding does not happen a lot, ambient occlusion usually provides a pretty good estimate for the indirect illumination, and I would like to further explore the possibilities of combining ambient occlusion with irradiance caching in the coming week. I will keep you posted.
The first is a video showcasing the status of the renderer with irradiance caching:
Then we have a screen shot of the ambient occlusion computed result. Finally there's a video showing the performance of ambient occlusion.


The first is a video showcasing the status of the renderer with irradiance caching:
Then we have a screen shot of the ambient occlusion computed result. Finally there's a video showing the performance of ambient occlusion.


Sunday, November 7, 2010
More updates on Monday about Irradiance Caching
I'm currently still working on the irradiance caching implementation. The speed now is ~2 seconds for cache sampling and almost instantaneous rendering. However, there are still lots of visual glitches and I'm in the process of improving the image quality. This is a sketch of the irradiance caching algorithm:
1. In the image space, compute the error in all directions according to the classic irrandiance caching method. The error takes into account both spatial displacement and difference in normal. We sum up the errors to all the neighboring pixels for all the points in the image space in parallel.
2. Then, a probability based sample selection is performed, essentially picking sample points according to the error. The larger the error, the more likely the point is to become a sample.
3. Instead of storing the cache in a spatial acceleration structure such as a quad-tree, we directly compute the effective radius of each of the sample points in parallel. Then for all the pixels within the effective region of each sample points, we add a reference of the sample point. After this step, each pixel in the image space will have a list of irradiance caching sample points it needs to take into account, essentially trading space for time.
4. After the irradiance cache has been built, the rest of the rendering is done using the common method.
Due to the visual glitches as shown in the following image, I'm still working on the improvement, and hopefully I can post some updated results on Monday.

Subscribe to:
Posts (Atom)