It's been quite some time since my last post. It's close to the final presentation now, and I made some final touch to the renderer. Here's some new screenshots:
As you might have noticed, the following features were added:
1. Multiple light sources. Parallel light sources and spherical light sources.
2. Depth of field effect.
3. Adjusted photon mapping algorithm.
4. Ray tracing based on parallel ray compaction as opposed to a long pipeline.
It's been quite some time since I last visited my blog. I just realized that I didn't put any sort of "final report" thing up. And here it is. You can download it from HERE.
Transparent objects and caustics via photon mapping is also supported now. Here's some more screenshots:
During the past week, I decided not to continue on the REYES type renderer since it is really difficult to optimize to interactive rates and the rasterization scheme is out of the scope for this current project. Instead, I went on fixing bugs and tried to improve the rendering process within the given framework of the renderer.
First, I found a pretty serious bug with the photon shooting/scattering part of the tracer. For all the photons, only the first-bounce photons were recorded with correct power; the later, multi-bounce photons had zero power. Essentially, the renderer was only rendering first bounce indirect lighting, and that explains why the Sponza scene was so dark. I only discovered this problem when I started to directly visualize all the photons on the screen (which I should've done a lot earlier...) Anyways, this is the current rendered image of the Sponza scene. Note that the color bleeding is much more interesting, and I also added sky color bleeding, which is added to the image whenever secondary rays hit the sky, and sun-like parallel lighting,
Then, I explored the possibility of providing a fast previewing feature. The basic idea is to introduce a post-processing step when the sampling count is low (eg. only around 10-20 samples per pixel which naturally would introduce a lot of noise and artifacts).
Inspired by the idea of irradiance caching, we apply a final post-processing step so that we can minimize the number of required final gather samples per pixel while achieving similar results. The basic idea is to do an image-space irradiance interpolation on the rendering canvas. For each one of the pixels, x, in the canvas in parallel, we examine all the surrounding pixels within a preset radius r. For each of the nearby pixel xj, we compute its weight by
where x, xj, n(x), n(xj) are the spatial positions for the two pixels and their respective normals. The rj term is a harmonic means of the distances from the xj to nearby geometry. This value can be easily while final gathering is done on each pixel, where we have the distance information for each final gather sample, via the following formula:
Where N is the number of final gather samples, di is the distance to each secondary intersection. Note that in order to progressively compute the value of rj, we compute its reciprocal, 1/rj, so that for each additional final gather sample, we can simply add 1/di/N to the current 1/rj value.
With all the weights computed, we can compute the diffuse irradiance value at x by
Where E(x) is the existing diffuse values stored in the canvas. With this final postprocessing step, we essentially smoothen the indirect illumination across the entire scene. In practice, we found that a searching radius of 7 works best for improving image quality. When implemented in CUDA with shared memory, the computational overhead for this step is almost negligible at less than a tenth of a second.
The three images below showcases the effects of the post-processing step. The top image is rendered with only 12 samples/pixel, without the postprocessing step. The middle image is postprocessed, with the same 12spp setting, rendered in 2.2 seconds. The bottom image is a reference image rendered with 300spp, taking 42.3 seconds to render. All three images are rendered with 800x800 resolution and 200,000 photons. Notice the smoothness in indirect lighting in the middle image, but also note its problem: the places where Rx is small (local geometry hinders the light reception) lost the darkness. This problem might be addressed by shooting more final gather rays and avoid interpolation for those spots and is worth future research.
Finally a video showing the current status of the renderer:
In the past week, most of the work was done in the back end. I re-arranged the code-base which had been pretty messy till last week. Basically, I had this giant main.cpp, engine.cu, objLoader.cpp, a couple of header files and that's it. The main.cpp and engine.cu were each over 1600 lines of code and it was really a magic to see all of this glued mess working. So I did lots of refactoring work, summarized as follows:
1. Scene graph related stuff was put into a SceneManager class. It references another class, KdTreeBuilder, which is in charge of Kd-Tree and photon mapping construction. It also implements a transformation-less scene graph, which are basically a mesh split into objects. Every time a transformation is done to the objects, the new coordinates are directly computed and embedded into the mesh, and Kd-Tree/Photon map is re-built on the fly.
2. Rendering related stuff was put into a RenderManager class. It keeps track of the current rendering settings (parameters, render methods, etc.)
3. The CUDA source, engine.cu, was also split among rendering, helper methods and Kd-Tree building functions. Each kernel function has a wrapper C function that automatically sets up the block and thread settings for the kernels.
I also came up with an interesting idea to explore if I have enough time before the end of the semester. After reading Point-Based Approximate Color-Bleeding paper by Christensen et. al. (http://graphics.pixar.com/library/PointBasedColorBleeding/paper.pdf), I thought it would be interesting to see if this can be used on my renderer. The basic idea is to divide each polygons into small disks, or surfels, and arrange them into an octree. Whenever we need to compute indirect illumination on a point, we simply rasterize the surfels or octree nodes on a view cube around the point and then multiply the result by the surface BRDF. I would like to use ray trace for the direct illumination, kd-tree for surfel storage and same rasterization strategy and see what I can come up with.
Finally, a screen shot of the classic Cornell Box scene of a prototyped version that implements part of the paper mentioned above. Rendering takes 3 seconds on this 640x640 image with 200spp. More details will follow as I make more progress on this.
The week of Thanksgiving gave me both time to go to Chinatown to have Thanksgiving dinner, time to gamble a bit in Atlantic City, and time to polish my renderer. Speed was once again improved due to a more "greedy algorithm" in scene traversal. Moreover, path tracing support was also added to the renderer (using a path tracing / bidirectional path tracing hybrid model), and it works really well for outdoor scenes, where photon mapping lacks good support. Next, the scene can now be freely edited. Each object as defined in the obj file is extracted out as separate objects, and the user can translate/scale/rotate/delete any of them as needed. Thanks to the fast kd-tree/photon map builder, operating on the scene and reconstructing the entire kd-tree is pretty painless. Last but now least, we can now freely choose from one of six rendering methods during run time: OpenGL wireframe, OpenGL smooth, (bidirectional) path tracing, direct photon mapping, photon mapping with final gathering and ambient occlusion. Below are three videos showcasing the renderer's current capabilities with different scene settings.
The first is a test scene I made for path tracing and scene editing. It includes a bunny, among other objects. The scene contains only 7K triangles.
The second video is our familiar Sponza scene, with 72K triangles. Note the improved performance and brighter interior space (after a fix made to Photon Mapping algorithm).
The third video is for editing the new interior scene, with 608K triangles (I got the wrong triangle count the last time).
After spending today tweaking the indoor scene settings, adding more textures, using disk-shaped photon collector instead of a spherical one, making the light source external and sun-like, and fixing bugs here and there, the image quality is notably better:
Note that by using disk-shaped collector, false color bleeding near the edges and on thin objects (quilt, books) has been largely solved.
The last week I began to use an actual indoor scene for my renderer. It was freely available online, but since it was made with 3DS MAX and V-Ray and the OBJ exporter doesn't support V-Ray textures etc, I had to remap all the material and textures (They are not set either, I had to literally look at a final render the website provided and do some matching work). I also made up a test scene to play with different BRDF (the renderer only used to support perfectly diffuse, Lambertian surfaces). The following is a test scene with ambient occlusion and glossy reflection.
So I started with this scene with no texture mapping, material settings. It contains 1400K triangles, many more than Sponza's 70K, and can indeed be a stress to the renderer.
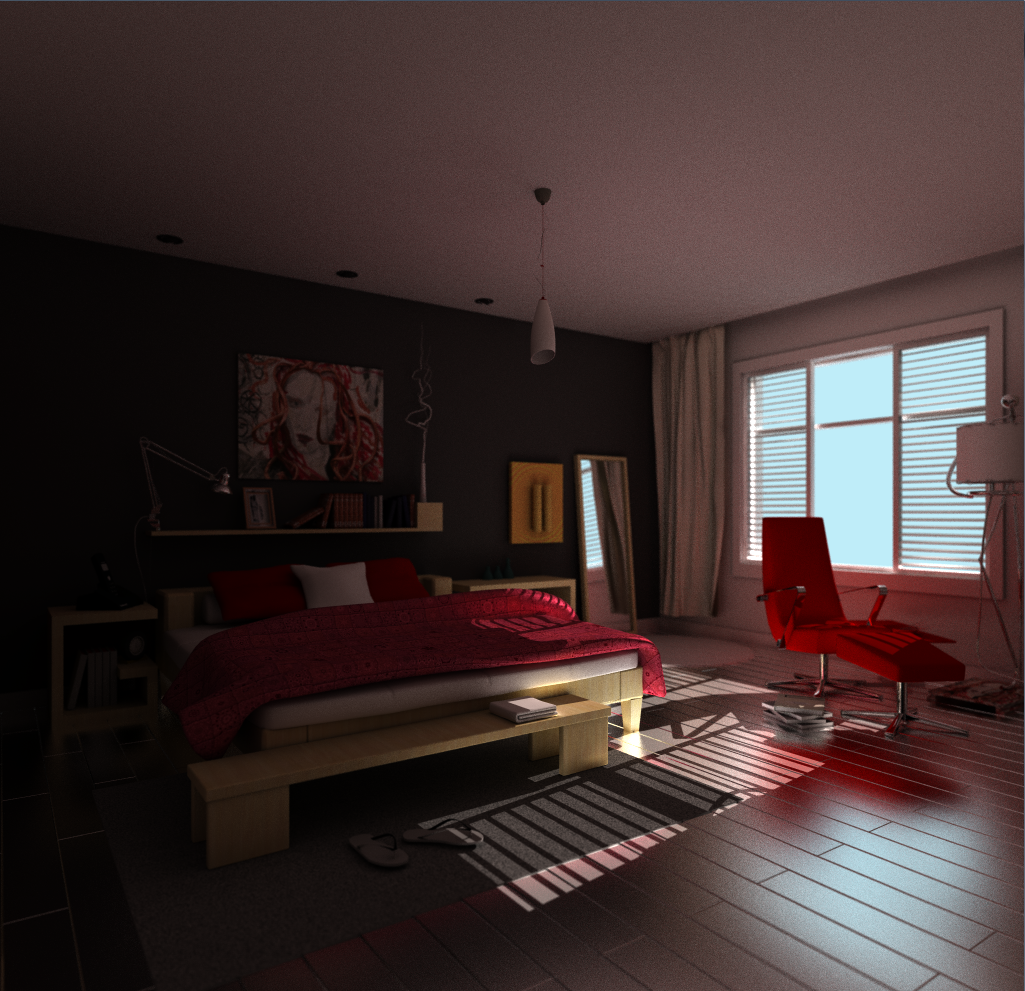
I had to find textures from online and set all the materials (lots of which needed to be set manually in the MTL file since I'm not familiar with 3DS MAX). I also implemented normal mapping, perfectly specular material, and Oren-Nayar reflectance model. After increasing the photon count to 200K, the current result is shown in the following image.
Notice the correct color bleeding (it wasn't correct at the beginning and that wasn't found in the Sponza scene since the mesh kind of has a uniform color). Also note that the floor and the left wall is glossy, the mirror is perfectly specular, the quilt is Lambertian, some of the wooden furniture is Oren-Nayar and the rest are Phong. Also, the quilt and the rug have normal maps attached. With this setting, I'm still able to achieve interactive rate (shown in the video below). I also fixed the problem where the program with reset the video card after a timeout. In addition to cudaThreadSynchronize() to make the calls synchronous, we also need to set two registry keys in Windows to bypass the timeout check.
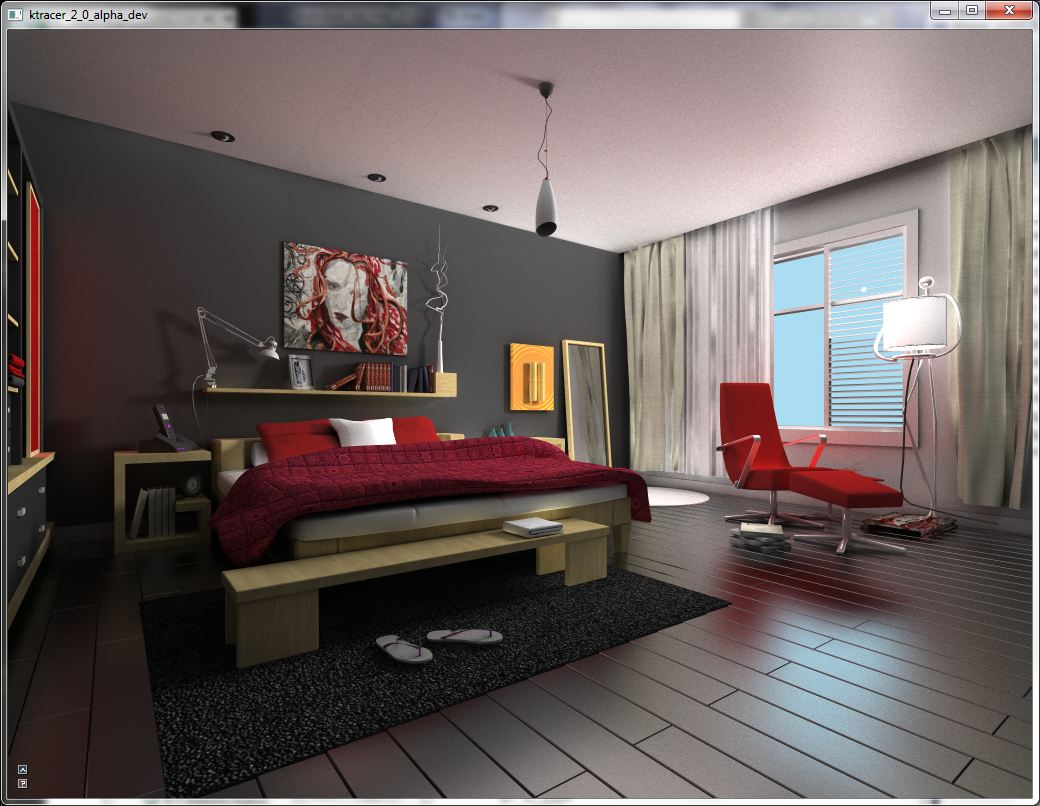
Finally, this is a rendering result provided by the website providing the 3D model. There's obviously still a long way to go before achieving this level of picture quality, and it can be very challenging considering the interactive nature of this renderer.


